Cold Dog (unbaked chocolate cake)

This is another one of my favourite recipes that my mom used to make! It is simple and a great cake to make ahead. It keeps well in the fridge.

This is what you’ll need to make the cream filling:

– 250 g Coconut oil

– 1 pk of Vanilla sugar

– 40 g Cocoa

– 40 g Chocolate powder for hot chocolate

(if you like dark chocolate, use 75 g of Cocoa and no chocolate powder instead)

– 1 dash of salt

– 120 powdered sugar

– 2 eggs

– 1 Tbsp of Rum (Optional)

You will also need:

1 – 1 1/2 packages of -Social Tea biscuits- (the ones in this picture I bought at Loblaws) but No Frills for example, has them too; the box just looks different.

Prepare:

Line your bunt form/loaf pan (or similar) with parchment paper and put aside. Do a “dry run” on how many biscuits fit into the form you have; you might have to cut biscuits with a segregated knife to fill the whole length of the form properly.

Melt Coconut oil on very low temperature on your stove, let cool completely, put into bowl of Kitchenaid or similar. Add Vanilla Sugar, Cocoa, Chocolate powder, Salt, Powdered Sugar.

Mix well

add the two eggs and keep stirring

It will be a nice creamy mixture.

I usually start with a layer of biscuits (in the original recipe it says start with cream). It is a little messy at the beginning no matter how you begin.

Layer cream and biscuits the way you see it in the pictures. You could decorate the top with some excess filling or use a stencil to decorate it a bit instead.

Cover the finished cake with foil and put it into the fridge for at least two hours.

Take out of form and cut only with a serrated knife or it will be difficult to cut through the biscuits.

A wonderful cake to enjoy with a coffee, tea or a glass of milk! Enjoy.

A before and after…

A while ago I bought this metal plate at a thrift shop and had the idea to make a concrete frame/wreath from it. I haven’t really been able to find out what the story is that is depicted on the plate, but I really enjoyed the scene portrayed despite that. 🙂

Here is the result:

Austrian spelt bread

0A36D71B-295E-4EAE-A5E5-A146A7004895

If you like Pumpernickel bread you will like this bread even more … read on…. !

On a recent trip to Austria we stayed at this really nice hotel at Weissensee (www.forellemueller.at). A gorgeous place, wonderful hosts plus their food was outstanding and the Weissensee region is pretty much Paradise at any season!

The Hotel offered some classes on cooking or baking  so I attended one mini lesson in making this really tasty bread which was always availabe on their breakfast buffet!

This will be probably the easiest bread you’ll ever make! I like it also because it is, and stays, moist for a long time and does not turn dry the next day already like some other breads tend to do. This is the recipe and how it’s done:

First Grease a loaf form and put aside.

Next mix:

1 Tbsp. of dry yeast

1 Tbsp. of honey or sugar

1/2 dl luckwarm water

in a cup and set aside so it can start working.

0B790E45-9E94-4F14-A3D9-C6739685BAC7


Meanwhile in a large bowl mix:

3 1/2 cups of dark spelt flour

2 teaspons of salt (I use Himalayan if you are wondering about the pink color)

3 Tbsp. flaxseeds (ground preferably)

3 Tbsp. Sesame seeds

4 Tbsp. Sunflowerseeds

2 Tbsp. Pumpkinseeds

Warm water

8F28235C-D09F-42A8-B8A1-9BC2E6F1D60F

Mix well by hand and then add the yeastmixture, which by now should have at least doubled in size, and more warm water; a little at the time (I always mix with my right hand and with me left one I pour more warm water if needed).

173419AB-2B2A-4A8C-BB67-722D2E272755

This is what the dough will look like! Notice, it is very wet and sticky and that is what we want! Now you put the dough into the greased loafpan (no need to let the dough rise first!) and with wet hands or a spatula smooth it out a bit.711A3FF3-C82D-4394-91AE-91180A9ED863

Now we put it into the COLD oven (again, we don’t let it go first) and turn the oven to 390 Fahrenheit for exactly 45 minutes. Take the bread out of the pan, flip it upside down and put it back into the oven for 10 more minutes. Let cool on coolingrack. 5EEEDC59-85CB-4514-A68E-6D2778EE1B0D


Enjoy!


Because you made it this far; here are a few more images from the Weissensee region!

The Weissensee is Europe’s largest nature icefield with 25 Km groomed tracks on it; pretty impressive…

113B08EF-E4F1-4717-85A0-622D12F163AB

110583A4-FE96-4D3E-842D-D673636B9DB39893105A-9105-412E-8EC6-C8ED2DC5C28E6A7C95D0-8E73-4A9E-B83A-25A30637EF7C


Scorbar Icecream Torte

IMG_9691
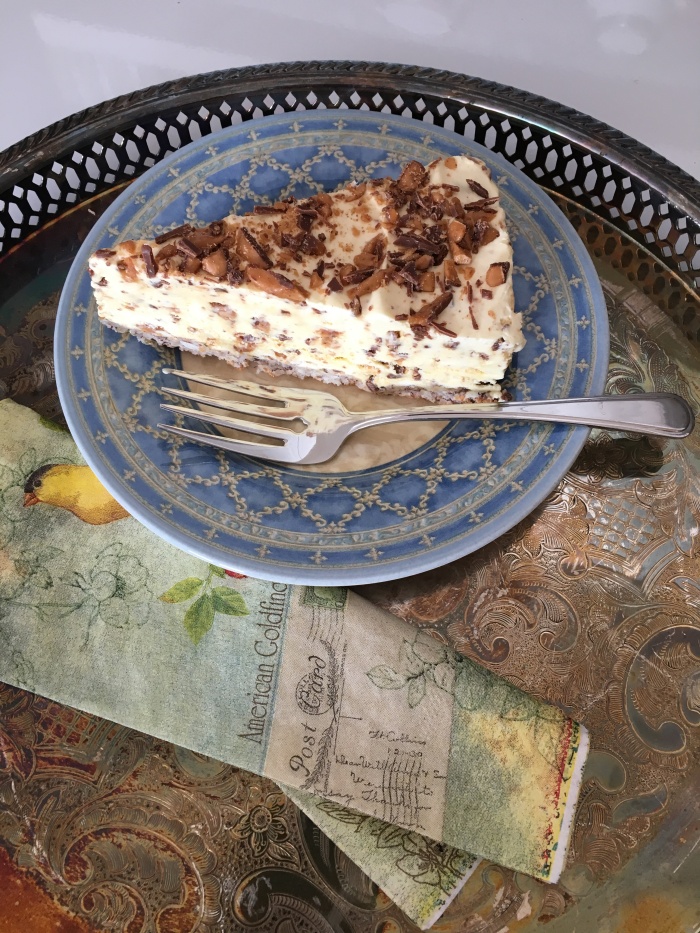
I want to share a dessert recipe today that is very tasty  and nice to prepare ahead if you know you’ll have company over soon. I find it simple and less sweet than a store bought icecream cake, well it is just better!

(First preheat your oven to 360 F. Prepare a round springform by lining the bottom with parchment paper and grease the side of the springform lightly with some butter.)

Now for the base you’ll need:

3 egg whites

1 dash of salt

1/2 cup of white sugar

1 cup of grated Hazelnuts or Almonds

Whip the eggwhites with a handmixer until they are stiff, add sugar and salt, stir some more. Fold the hazelnuts (or almonds) under the eggwhite mixture and then spread it evenly into the springform. Bake for about 20 minutes at 360 F on the bottom rack of the oven. Take out and let cool.

Take the base out of the form and place on a flat tray (I use the one I am serving it on later). Wash the “ring” of the springform and then put it, upside down, around the base/cake again (see picture below).

IMG_9555

Now we make the icecream filling:

You’ll need:

6 Eggyolks

6-9 Tbsp of sugar (6 is plenty I find )

Stir eggyolks and sugar with handmixer until nice, bright, yellow and fluffy.

In an other dish whip 4.5 dl. Whipping cream and add

1 package of “Whip it” to  it

5 Skor bars, cut them up into small pieces (keep approx. 1 back for decoration on top)

Add whippingcream and the cut up (4) Skor bars and fold under the eggyolk/sugar mixture and then spread it onto the base. Spread it all nice and flat and sprinkle the other cut up skorbar that you kept back, over it for decoration. Cover with sealwrap and put the torte into the freezer for at least 4 hours. Take out 15 minutes before serving it.

IMG_9689

Did I say it’s really good? It is really, really good!

Potatobread

This is a great recipe that I use a lot.  It is a soft bread with a crunchy crust!

img_9073

You’ll need:

1 1/3 cup of milk (a little more later, depending on size of potatoes)

2 tsp. salt

2 tsp. sugar

2 tsp. dry yeast

2 medium, boiled the day before, potatoes, peeled and grated (fine, see below)

3 1/2 cups white flour

1 cup whole wheat flour

Add everything to the breadmaker in this order and set to “dough”. You will want to be around when it mixes the dough as you might have to add a little more milk, depending on the size of the potatoes you used!


(This is what the dough looks like before it rises)! Once the dough is finished, take it out of the breadmaker and put it into a bowl so it can rise to about double the size. Cover with a damp cloth and set in a warm spot.

Now preheat the oven to 360 F and fill a pyrex form or something  else that is oven proof, with water and put the water on the top rack! This will give the bread a crunchy crust later! Bread goes on the bottom rack later.

Go back to your dough and once it is risen enough, take it out of the bowl and form two loafs and put on parchment covered bakingsheet. Cover  with the damp towel again. After about 1/2 hour, take towl off, cut some slits into the bread and put it into the preheated oven for about 35 minutes. To see if the bread is baked through, take one bread and “knock” onto the bottom. If it sounds “hollow” it’s done. Let cool on wirerack. As always, if you have a question about it; drop me a line.img_9067 Continue reading “Potatobread”

Candleholders and Saltcrystals

fullsizerender

I tried something new this week and it was kind of a fun thing to do….and cheap. Want to try it? Get a plain glasscontainer and add about 1/4″ of salt and then add water, just enough to moisten the salt.

Put the glasscontainer in a warm spot. Depending how warm it is it might take up to a week until the saltcrystals have formed all the way up! I put one jar in front of the fireplace  (but not to close) and it litereally grew about 1 1/2″ in a day! If the jar is not covered in crystals all the way up and nothing seems to happen, add a bit more salt and water and let sit…and grow.

img_9103

Do you like the look of the glass? If you are tired of it just soak the glass and wash it off. Have fun with it.

Vreni’s European Lebkuchen (Gingerbread)

img_6536I love Gingerbread very much! It reminds me of my childhood when my mom would bake it, around this time of year, back home in Switzerland. The smell is just incredible and they taste so yummy! I love those soft Lebkuchen with a glass of milk or a nice Cappuccino! Here is the recipe:

Lebkuchen:

500 grams of white flour

30 grams of -Lebkuchengewuerz- (Gingerbread spice mix). You get this at a European Delicatessen store like Alicia’s in London, Ontarioimg_6617

80 grams of white sugar

a dash of salt

100 grams of Molasses

100 grams of Honey

2 Tbsp of hot water in which you disolve>

> 1/2 Tbsp of Bakingsoda

~ 1 1/2 ml of milk

… Some Heavy Cream to brush over the baked Lebkuchen.

Put all the ingredients (except for the milk) into a bowl. If you own a Kitchenaid machine it is easiest! Start the machine and let it mix. Add from the milk slowly as you might not need all of it. The texture of the molasses and honey can change that amount a bit. You want a dough which you can easily take out of the bowl at the end. When the dough is finished cover it and put it into the fridge for at least 30 minutes. You can also make the dough, keep it in the fridge, and process it further the next day!

Preheat the oven to 360 F.

Take the dough (I usually use half of it first and later the second half) and roll it out with a rollingpin on a floured  surface to about 4 mm thick. Use cookie cutters to make your Gingerbread people or  cut out  circles or any other different shapes if you wish!

Bake them on a bakingpaper lined bakingsheet for about 10-12 minutes. Take out of the oven and immediately brush the hot Lebkuchen with the cream (this makes them glossy) and then transfer them to a cookie rack.

Let them cool completely. Now you can decorate them with icing (icingsugar and water mixed). I used about 80 grams of icingsugar and added water slowly as it can’t be runny! I filled it into a small Ziploc bag and pushed it into one corner. Cut Off the tip ot the bag and go to town! 😜 I mean not literally but have fun decorating. 😎Let the icingsugar get dry for about 2 hours before you put them into an airtight container. Enjoy!

As usual, if you have a question or a comment; just drop me a line…

Driftwood Christmastrees

Since I have collected driftwood for a long time now, I decided to finally make something with some of it! Tom cut out the plywood trees for me (thanks Tooom;-) after I drew the triangles onto the plywood with a marker (so we would not end up with a miscommunication🙄 you know) about the size I wanted the cut outs and he let them through the saw for me. You can make them pretty much whatever size you wish! dsc03365

The plywood I used here is about 1/4″ thick. Next I searched for the straightest pieces of Driftwood that I had; in all the sizes I needed. It’s best to first lay the pices onto the cut-out plywood until it is all covered to the top. I always let the driftwood overlap about an inch over the wood on each side; so the plywood would not show. Now you can use a good, heavy duty  wood glue or a gluegun to glue each piece of driftwood down. If you wish you can paint your tree(s) but I like them just the way they are! You could apply a hook to the back if you want to hang them onto the wall instead of having them just lean against something…  So now; next time you go to the beach in the summer (or at least when there is no snow on the ground) you have a purpose to bring lots and lots of driftwood home :-). Make sure you wash it thoroughly and let it dry before you store it so it does not turn moldy on you should you keep it in a air tight container😚.

img_6543Do you like my decor? 🙂

Advent

Happy 1st of Advent! I always make some kind of Advent decoration for the table. This a bit different than usual. It is not a wreath with greenery and red candles! It also took me longer to gather the materials than to actually make my take on the Advent-wreath, ha! I got some hay at the barn and placed some of it into a flat tray. (I like to use trays as I can easely move it around and put it somewhere else when we eat). Then I added some of my cement candleholders that I made recently; with white candles in it. I love little angels and so this one got to lay in my tray :-). You might have something else around that you would like to place in your tray? Maybe some small trinkets or even some items that you might have hanging in your Christmas tree? Lastly I used some paper stars that I have cut out of an old book (I can not just watch TV; I always have to do something while I do that!). I used some copper thread on my sewing machine and sewed them into a garland, leaving about 3-4″ of thread between paperstars.Voila! If you have any questions about this; as always, just ask!

fullsizeoutput_34ffullsizeoutput_350fullsizeoutput_355fullsizeoutput_34edsc03389